Label makers efficiently organize and identify items, offering diverse models for various needs․ From basic handheld devices to advanced connected options,
they streamline tasks for businesses and home users alike․
What is a Label Maker and Why Use One?
A label maker is a device designed to print labels – pieces of paper or plastic affixed to objects for identification or to convey information․ These handy tools are invaluable for organization, ranging from home use like labeling storage containers and files, to professional applications such as asset tracking and product marking․
Why utilize a label maker? They offer a professional, consistent appearance compared to handwritten labels․ They save time and effort, especially when needing multiple identical labels․ Furthermore, label makers provide durability; printed labels resist fading and smudging․ For businesses, clear labeling enhances efficiency and reduces errors․ Choosing the right model depends on volume and desired features, from simple handhelds to smartphone-connected options․

Types of Label Makers Available
The market offers a diverse range of label makers․ Handheld label makers are portable and affordable, ideal for basic labeling tasks․ Desktop label makers provide faster printing and larger displays, suited for higher volumes․ Bluetooth/USB connected label makers, like the Brother P-touch PT-D460BT, offer advanced features via smartphone apps or computer software, enabling custom designs and template use․
Consider tape width capabilities; some models handle narrower tapes, while others accommodate wider options․ Features like built-in fonts, symbols, and frames also vary․ For large-scale projects, models with a “halfcut” feature are beneficial, saving tape by allowing multiple labels on a single strip․ Ultimately, the best type depends on your specific labeling needs and budget․
Setting Up Your Label Maker
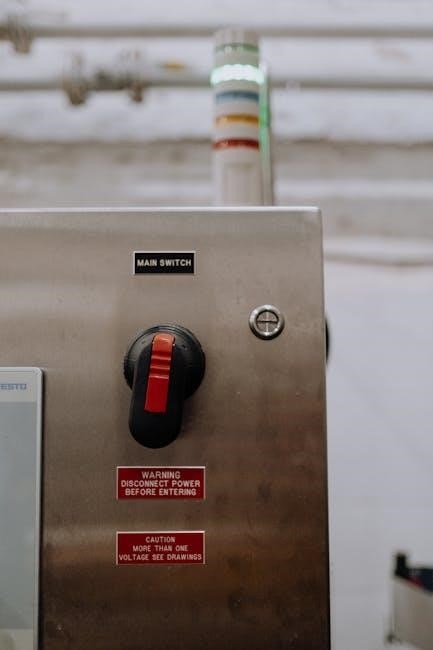
Proper setup involves installing batteries or connecting a power source, carefully loading the label tape, and configuring initial device settings, including language selection․
Installing Batteries or Power Source
Most label makers operate either on batteries or with an AC adapter․ For battery-powered models, typically you’ll need to locate the battery compartment, often on the back or bottom of the device․ Insert the correct type and number of batteries – usually AAA or AA – following the polarity markings inside the compartment․
Ensure the batteries are securely in place before closing the compartment․ If your label maker comes with an AC adapter, plug it into a power outlet and connect it to the device․ Some models can function with both batteries and an adapter; others will disable battery power when plugged in․ Always refer to your label maker’s manual for specific instructions regarding power source installation․
Loading the Label Tape
Loading label tape is a straightforward process, but varies slightly by model․ Generally, open the label compartment, usually located on the front or side of the label maker․ Insert the label cassette or tape roll, ensuring it clicks securely into place․
Feed the label tape through the guide slots and rollers, following the diagram printed inside the compartment․ Proper alignment is crucial for smooth printing․ Close the compartment until it latches․ Some label makers automatically detect the tape type, while others require manual selection via the device settings․ Always consult your label maker’s manual for detailed loading instructions specific to your model․
Initial Device Settings & Language Selection
Initial setup often involves powering on the label maker and navigating the settings menu․ This is typically accessed through buttons on the device itself․ The first step usually includes selecting your preferred language from a list of options․
You may also be prompted to set the date and time, and configure other preferences like auto power-off settings․ Some advanced models, like the Brother P-touch PT-D460BT, allow for initial configuration via a connected computer or smartphone app․ Ensure you save your settings before proceeding to label creation․

Basic Label Maker Operations
Label creation begins with text input using the built-in keyboard or connected device․ Explore formatting options to customize fonts, styles, and sizes for clear identification․
Entering Text and Numbers
Inputting information into your label maker is typically straightforward․ Most models feature a QWERTY keyboard, allowing direct typing of text and numbers․ Some advanced label makers, like the Brother P-touch PT-D460BT, also support connection to smartphones or computers for easier text entry using familiar interfaces․
When entering data, pay attention to character limits displayed on the screen․ Utilize the shift key for capitalization and numbers often have a dedicated key or are accessed through a shift function․ Preview the label before printing to ensure accuracy․ Correcting errors is usually done via backspace or delete keys, so double-check your work before committing to the final print!
Formatting Options: Fonts, Styles & Sizes
Label makers offer a surprising range of formatting options to customize your labels․ Beyond basic text, you can often select from numerous font styles and types – the Brother PT-D460BT boasts over 15! Adjust font sizes to fit your label dimensions and readability needs․ Many devices also include pre-designed styles, like bold or italic, for emphasis․
Furthermore, explore options for underlining or adding outlines․ Some models allow you to create stacked labels or mirror images․ Experiment with these features to achieve a professional and visually appealing result․ Previewing your label before printing is crucial to confirm the formatting looks as intended․
Adding Symbols and Frames
Label makers aren’t limited to just text; enhance your labels with a variety of symbols and frames․ Many models, like the Brother P-touch PT-D460BT, include extensive libraries – over 800 symbols and 140 frames are available! These can visually highlight important information or add a decorative touch․
Symbols range from common icons (like warning signs or recycling symbols) to more specialized graphics․ Frames create borders around your text, making labels stand out․ Experiment with different combinations to find what best suits your needs․ Remember to consider the label’s purpose and ensure the added elements don’t detract from clarity․

Advanced Label Maker Features
Advanced label makers offer templates, custom design options, and connectivity via Bluetooth or USB, expanding functionality beyond basic text and symbol insertion․
Using Built-in Templates
Many label makers, like the Brother P-touch PT-D460BT, include a library of pre-designed templates to simplify label creation․ These templates cover common applications, such as address labels, file folder identification, and price tags, saving users time and effort․
Navigating the template menu typically involves using the device’s buttons or touchscreen to browse categories․ Once a template is selected, users can customize the text fields with their specific information․ The built-in templates often offer options for adjusting font styles, sizes, and adding symbols or frames to personalize the label further․ This feature is particularly useful for individuals who are new to label making or prefer a quick and easy solution for frequently used label types․
Creating Custom Templates
Beyond built-in options, many label makers allow users to design and save their own custom templates․ This feature provides maximum flexibility for specialized labeling needs․ Typically, you’ll start with a blank label layout and utilize the device’s formatting tools to arrange text, symbols, and frames precisely as desired․
Once the layout is perfected, the template can be saved for future use․ This is incredibly efficient when repeatedly creating labels with the same design, such as for product packaging or asset tracking․ Some advanced models, like those compatible with P-Touch software, enable template creation on a computer and transfer to the device, offering a larger screen and more sophisticated design capabilities․
Connecting to a Computer or Smartphone (Bluetooth/USB)
Modern label makers often offer connectivity options like Bluetooth and USB, expanding design and editing capabilities․ Connecting to a computer or smartphone unlocks access to dedicated software or apps, providing a larger interface and more advanced formatting tools than the device’s built-in screen allows․
Bluetooth pairing enables wireless label creation from a smartphone or tablet, offering portability and convenience․ USB connections facilitate direct transfer of templates and labels from a computer․ The Brother P-touch PT-D460BT, for example, leverages both methods․ Software often allows importing spreadsheets for bulk label creation, streamlining tasks like labeling security cameras with pre-defined names․

Specific Label Maker Models ⎯ Brother P-touch PT-D460BT
The Brother P-touch PT-D460BT is a connected label maker offering a robust design, extensive font and symbol library, and a valuable two-year warranty․
Overview of Brother P-touch PT-D460BT Features
The Brother P-touch PT-D460BT stands out as a versatile business expert label maker, seamlessly blending smartphone app flexibility with a built-in keyboard for convenient operation․ This model excels in producing crisp, sharp, and durable labels, crucial for professional organization․ It boasts an impressive library containing over 15 font styles and types, alongside 140 diverse frames and an extensive collection of 800 symbols, enabling highly customized label creation․
Furthermore, the PT-D460BT distinguishes itself with a comprehensive two-year warranty, providing peace of mind for business users․ Its connectivity options, including Bluetooth, facilitate easy integration with mobile devices, while the included software expands design possibilities․ This label maker is ideal for those needing robust features and reliable performance․
Using the Brother P-Touch Labeler Software
The Brother P-Touch Labeler Software significantly expands the design capabilities beyond the device’s built-in features․ Users can create more intricate and personalized labels directly on a computer, leveraging a wider range of fonts, graphics, and layout options․ This software allows for batch label creation, streamlining tasks like labeling numerous security cameras – a process greatly aided by compiling device names into a spreadsheet for easy import․
The software facilitates precise control over label formatting and content, ensuring consistency across large projects․ It’s a valuable tool for businesses and individuals requiring professional-looking labels and efficient label management, enhancing organization and identification processes․
Warranty Information for Brother Label Makers
Brother stands behind the quality of its P-touch label makers, offering varying warranty periods depending on the specific model․ Notably, the Brother P-touch PT-D460BT Business Expert Connected Label Maker distinguishes itself with a comprehensive two-year warranty, providing extended peace of mind for business users who rely on consistent performance․
This warranty typically covers defects in materials and workmanship under normal use․ It’s crucial to retain proof of purchase for warranty claims․ Reviewing the specific warranty documentation accompanying your Brother label maker is essential to understand the complete terms, conditions, and limitations of coverage․

Troubleshooting Common Issues
Common problems include label jams, tape recognition errors, and connectivity issues․ Clearing jams carefully and ensuring correct tape loading are vital for smooth operation․
Label Jams and How to Clear Them
Encountering a label jam can be frustrating, but addressing it correctly prevents further damage․ First, immediately power off the label maker to avoid internal component stress․ Gently open the label compartment, carefully removing the jammed tape․ Avoid using sharp objects that could scratch or damage the printer mechanism․
Inspect the area for any small tape fragments remaining․ Ensure the tape is loaded correctly before attempting to restart the device․ If jams persist, verify you’re using compatible label tape specified for your model․ Consistent jams might indicate a mechanical issue requiring professional repair or replacement․ Regular cleaning of the internal components can also help prevent future occurrences, ensuring optimal performance and longevity of your label maker․
Printer Not Recognizing Tape
If your label maker isn’t recognizing the tape, several factors could be at play․ Initially, confirm you’re using a tape cartridge specifically designed for your model – compatibility is crucial․ Ensure the tape is loaded correctly, following the device’s diagram; sometimes, it needs a firm, but gentle, push until it clicks into place․
Check for any obstructions within the tape path․ Clean the tape guides with a soft, dry cloth to remove dust or debris․ If the issue persists, try a different, known-good tape cartridge to isolate whether the problem lies with the tape itself or the printer․ A faulty tape sensor might require professional repair if these steps don’t resolve the issue․
Connectivity Problems (Bluetooth/USB)
Experiencing Bluetooth or USB connectivity issues? First, verify Bluetooth is enabled on both your label maker and your smartphone or computer․ Ensure devices are within range for a stable connection․ For USB connections, try a different cable and USB port, confirming the port functions correctly with other devices․
Check for driver updates on your computer, especially if using a USB connection․ Restart both the label maker and the connecting device․ If Bluetooth pairing fails repeatedly, “forget” the device on your smartphone/computer and re-pair it․ Consult the label maker’s manual for specific troubleshooting steps related to its connectivity features․

Label Management in Digital Environments (Gmail)
Gmail labels categorize emails without physical relocation, unlike folders․ They’re user-specific and remain even after deleting messages, aiding efficient email organization․
Creating and Managing Labels in Gmail
Gmail’s labeling system provides a powerful method for organizing your inbox beyond simple folders․ To create a new label, navigate to the Gmail settings and select “Labels․” Click “Create new label” and provide a descriptive name – for example, “Work,” “Family,” or a project-specific title․ You can also nest labels under existing ones for a hierarchical structure․
Once created, labels can be applied to emails directly from the message view or by selecting multiple emails and choosing the “Label” option․ Labels are fully customizable; you can change their color for visual distinction․ Remember, labels aren’t folders – an email can have multiple labels applied simultaneously, offering flexible categorization․ Managing labels involves editing their names, colors, or deleting them when no longer needed, ensuring a streamlined inbox․
Deleting Emails Within a Label (Bulk Deletion Limitations)
Deleting emails within a Gmail label requires understanding its limitations․ Selecting the checkbox “All” in the top left corner only deletes the first 50 visible emails within that label․ To delete more, Gmail prompts you to “Select all X emails under label Y,” appearing on the same line as the initial selection․
However, even this extended selection might not capture all emails if the label contains a very large number of messages․ Gmail’s interface handles bulk actions in batches․ For complete removal, you may need to repeat the “Select all” process multiple times, or utilize Gmail’s search operators to refine your selection and delete in smaller, manageable groups․
Labeling for Specific Applications
Specific applications, like security camera labeling, benefit from features like “Halfcut,” saving tape and streamlining the process for numerous items efficiently․
Labeling Security Cameras ─ Efficiency Tips
When labeling numerous security cameras, efficiency is paramount․ Utilizing a label maker with a “Halfcut” feature dramatically reduces wasted label tape․ Instead of individual labels for each camera, this function allows for multiple labels on a single strip, connected by a lead․ This is especially beneficial when dealing with installations requiring labeling of 100 or more cameras․
Furthermore, pre-planning and utilizing software, such as the Brother P-Touch labeler software, can significantly speed up the process․ Creating a spreadsheet containing all device names allows for easy import and printing․ This minimizes manual input and reduces the potential for errors, ensuring accurate and consistent labeling throughout the security system․
Using Halfcut Feature for Multiple Labels
The Halfcut feature on many label makers is a game-changer for projects requiring numerous, smaller labels․ Instead of wasting tape with individual labels, Halfcut allows you to print multiple labels in a row, connected by a small bridge․ This significantly conserves label material, especially crucial for large-scale labeling tasks․
This feature is particularly useful when labeling security cameras, where dozens or even hundreds of devices need identification․ By using a single strip for multiple labels, you minimize tape usage and reduce the need for frequent tape changes, boosting overall efficiency and saving resources․ It’s a simple yet powerful function for any labeling project․